
If you have ever read an AI draft and felt like it was written by someone who has never met your company, you already know the problem. The model has no idea what your product actually does, which claims you are allowed to make, or which words your brand never uses. A brand kit for AI content fixes that by giving the model a structured source of truth to read before it writes anything, instead of leaving your brand to live in one person's head or a scattered pile of old PDFs. This guide walks you through how to set up brand kit AI generation tools can actually use, step by step, so every draft starts closer to publish-ready.
A quick distinction before you start. A brand kit for AI content is not the same thing as a voice and tone document written for people to read. A voice document explains your personality to a human writer. A brand kit turns those same decisions into fields and rules a model can retrieve and apply: facts, claim boundaries, terminology, visual tokens, and formatting, not just a description of your vibe. This guide covers building that configurable kit. It does not cover the day to day work of editing drafts or running review cycles, since that is a separate skill your team layers on top of a good kit.
Step 1: Decide what the kit covers and where it lives
Start by deciding what the kit is responsible for and picking one place for it to live. A scattered brand kit is really no kit at all, so before you write a single rule, settle on one canonical file or workspace that holds the current version. Think of this as your AI style guide config, the one place every writing tool checks before it drafts anything.
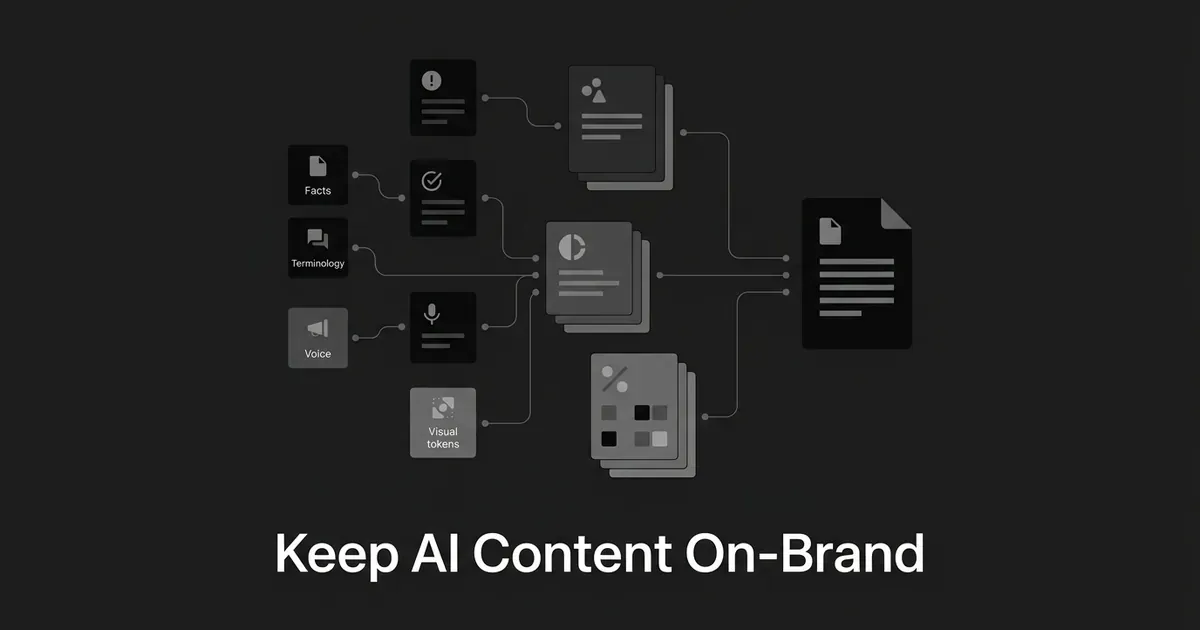
A complete kit usually covers company identity and positioning, your products and services, audience and buyer context, approved terminology, voice and tone behavior, writing mechanics and formatting, visual identity and image rules, approved and prohibited claims, and output profiles for different content types and channels. If the AI platform you use lets you separate instructions from reference material, keep behavior rules (how the model should act) apart from knowledge files (the facts it should draw on) and any visual assets like logos or color tokens.
Build it so it works across formats: articles, landing pages, social posts, email, and product copy can all pull from the same base rules, with channel-specific behavior sitting in its own output profile rather than buried in one long paragraph of global instructions.
You know this step is done when a new teammate can find the current version, name the owner, and tell which fields apply to a given piece of content without asking around. A common mistake here is uploading a folder of old campaign briefs, outdated product pages, and conflicting PDFs and calling that a brand kit. Conflicting source material just creates ambiguity for the model to guess through. If a document is out of date, archive it or label it clearly as historical, not authoritative.
Step 2: Build the facts and claims layer before you touch style
Facts come before style. A model cannot stay accurate about your product if the only thing you have given it is a description of your personality, so this step is about writing down what is true before you write down how it should sound.
Create structured records for your company (name, category, positioning, differentiators, business model, approved boilerplate), your products and services (features, use cases, supported integrations, limitations, competitors, approved descriptions), and your buyer personas (goals, triggers, requirements, objections, preferred terminology). Then build a claims table with at least three statuses: approved claims that can be stated directly, conditional claims that need a specific qualifier or audience attached, and prohibited or unverified claims the model should never state or imply.
Add one more rule that matters more than it sounds like it should: what the model does when the kit does not contain an approved fact for something it is being asked to write about. Tell it plainly to not infer the answer. It should omit the claim, use a marked placeholder, or say the information is not approved for publication, depending on your workflow.
This is where a platform like DeepSmith earns a mention, because it is built around exactly this problem. Deep IQ stores your company, product, persona, voice, and visual context as structured data, and Content Studio draws on that same stored context every time it writes, instead of asking you to restate your product facts and claim boundaries in a fresh prompt for every article. The point is not that a tool replaces this step, it is that storing the facts once and reusing them beats rebuilding your brand context by hand every time.

You are done with this step when every important product description has an approved version, every high-risk claim has a status and a qualifier attached to it, and the model has an explicit answer for what to do when information is missing. A common mistake is treating a feature list as a claim policy. Words like fast, best, secure, guaranteed, and number one all need a defined piece of evidence or a restriction behind them. Do not assume a model will know which of your marketing adjectives are safe to state as fact and which ones need backup.
Step 3: Turn terminology and mechanics into rules the model can follow
A preferred word list only works if it is a list the model can actually check against, not a paragraph you hope it remembers. This is the step that turns loose word preferences into a real brand style config AI writer tools can apply consistently. Build a terminology table with a column for the preferred term, the term to avoid, the replacement, whether the term needs to be spelled out on first use, the correct capitalization, and a short definition so the model does not use the word loosely.
Alongside terminology, write down your writing mechanics as fields the model can apply directly: sentence length preferences, paragraph and list usage, whether you write in active or passive voice, heading capitalization, punctuation rules, how you handle numerals and dates, acronym rules, and whether the output may use em dashes, emojis, exclamation marks, or rhetorical questions. If your brand uses sentence case for headings, say so explicitly. Do not rely on the model to infer capitalization from a few examples scattered through old articles.
It helps to separate voice from tone here too. Voice is the stable personality that holds across every channel. Tone is the adjustment you make for a specific context, so a brand that is always clear and direct might sound more reassuring in a support article and more restrained in a compliance notice, while the underlying voice never changes.
You know this step is complete when a writer or a model can resolve a terminology question without guessing, and a channel-specific profile can shift tone without touching the core voice rules underneath it. A common mistake is treating a word blacklist as a full style system. A list of banned words with no replacement and no reason attached is weaker than a shorter list of positive, concrete instructions that say what to do instead of only what to avoid.
Step 4: Make your voice rules testable with examples and priorities
Personality descriptions like professional, friendly, or innovative are not instructions a model can act on by themselves. Each one needs observable behavior attached to it: what the brand does, what it avoids, the typical sentence shape, the level of explanation it gives, and at least one example of on-brand writing next to one example of off-brand writing.
Write down a priority order too, so the model knows which rule wins when two of them conflict. A workable hierarchy runs from safety, legal, and claim boundaries at the top, down through product facts, audience and task requirements, channel or content-type requirements, global voice and terminology, formatting preferences, and stylistic flourishes at the bottom. Store that order in the configuration instead of leaving it implicit and hoping the model figures it out on its own.
Favor positive instructions over prohibitions where you can. "Lead with the answer in the first paragraph" and "use the approved product name exactly as written" give the model something to do. Follow those with a smaller number of narrow prohibitions, like not claiming a ranking unless the claim record has current evidence behind it. When you add examples, three to five per important output type is a reasonable range: keep them relevant to the actual task, varied enough to cover edge cases, and explicit about why each one is acceptable or not.
Pro tip: hand your configuration to a colleague who has almost no context on the brand and ask them to follow it as written. If they cannot tell what to do, what to avoid, or which rule wins in a conflict, the model will struggle with the same gaps.
Step 5: Turn your visual identity into tokens, not adjectives
"Use our brand colors" is not something a model can act on, because it does not say which color, in which role, against which background, with which text on top. Visual guidance for AI tools needs to be data, not a mood board.
For every color, store the token name, its role (primary, secondary, background, text, and so on), the hex and RGB values, whether it is mandatory or just preferred, and any pairing or contrast guidance. For typography, store the approved font family, available weights, which role each size plays (heading, body, caption), and fallback behavior if the primary font is unavailable. For your logo, store approved variations, minimum size, clear space, and disallowed treatments like recoloring or distortion, and be explicit about whether the model may reference the asset file directly or should leave a placeholder for a human to insert it. Do not ask an image model to redraw your logo from a text description if your brand requires the exact mark.
This is also where a platform's visual guideline file does real work. DeepSmith's Visual Guidelines module stores palette, typography, and illustration style as structured fields the way this section describes, so a cover image generation step can pull the correct tokens instead of guessing at what "clean and modern" means for your brand specifically.
Build separate output profiles for different asset types too, since a blog cover, a social graphic, and a product screenshot share the same brand tokens but need different dimensions, text limits, and layout rules. You are done here when a model can pick the right color token, the right typography role, and the right output profile without translating a vague adjective into a design decision on its own. A common mistake is stopping at "make it modern," which tells the model nothing usable about what modern actually looks like for your brand.
Step 6: Package the kit as a portable, machine-readable file
Keep a version of the kit that people can read, but also build a canonical JSON or YAML file, your machine readable brand guidelines, that tools can parse directly. There is no single brand-kit schema every AI platform accepts, so think of this as a practical structure to adapt rather than a fixed standard: a brand block with your approved positioning and differentiators, an authority block with your priority order and what to do about missing facts, product and persona records, a claims array with status and evidence fields, a terminology block, a voice block with stable traits and tone by context, visual tokens, output profiles by content type, and a short set of on-brand and off-brand examples.
JSON tends to work better when a platform or API needs strict validation or programmatic merging. YAML is easier for a person to read and edit but is more prone to small indentation mistakes causing problems. Markdown is fine for human reference material and examples but less reliable for strict field-by-field processing. If the tool you are loading the kit into supports schema validation, run the manifest through it before you upload anything.
Keep the manifest modular rather than one giant file. Stable rules like voice and terminology stay concise. Factual source material, like a long product spec, stays retrievable but separate. Output profiles carry the task-specific requirements so you are not repeating the same instructions in every profile. You know this step is done when your AI style guide config can be exported, versioned, and loaded into a different compatible tool without anyone rewriting the brand rules by hand. A common mistake is confusing this machine-readable kit with a public file meant to improve search visibility. This manifest is an internal generation configuration. It shapes how your writing tool behaves. It does not, on its own, change whether your pages get crawled or cited.
Step 7: Load the rules into your AI tool the right way
A brand style config AI writer tools can load correctly matters more than one that just looks thorough on paper. Having a good kit does not help if it lands in the wrong part of your AI tool's configuration. Most platforms with separate instruction and knowledge fields expect behavior, tone, priorities, terminology, and claim handling to live in instructions, while product documentation, approved messaging, and other reference material go in knowledge files. Keep knowledge files clear and text-forward, since a heavily formatted document is harder for a model to use reliably than a plain, well-headed one.
Tell the model directly whether it should quote or paraphrase uploaded material, and be explicit about "when X happens, do Y" style rules for anything with more than one step. For complex configurations, a predictable order helps: role and purpose first, then authority and priorities, source-of-truth rules, claim boundaries, terminology, voice and tone, output profile, examples, missing-information behavior, and finally the output schema.
This is the step where a platform that already grounds its writing in stored context saves you the most manual setup. Content Studio in DeepSmith is built around exactly this separation: Deep IQ holds the facts and rules, and the writing pipeline applies them automatically to every planned article, so you are not re-pasting your terminology table and claim boundaries into a prompt window each time you need a new piece written. That said, no configuration removes the need for judgment. Stored context reduces drift and rework, it does not guarantee every sentence is correct.
You are done when the tool has your behavior rules in its instruction layer, your reference facts in its knowledge layer, and a defined output structure for the content type you are producing. A common mistake is uploading a brand PDF as knowledge material and assuming its rules will automatically function as behavior instructions. If a rule actually matters, it needs to sit in the tool's instruction layer or a clearly designated configuration section, with the supporting facts linked to it.
Step 8: Version, govern, and hand off the kit
A brand kit is a maintained asset, not a one-time upload you forget about. Add a version number, an effective date, a last-reviewed date, an owner, and a change log. Track expiring claims and superseded terms so nobody accidentally publishes a claim that was quietly retired three months ago.
Use one update path. When a product name, a pricing detail, a visual token, or a positioning statement changes, update the canonical source first, then push that change down into whatever tools you have loaded the kit into. A reasonable review cadence is at least annually for a stable brand, quarterly for one that moves fast, and immediately after any brand refresh, new product, new channel, or material legal change.
Before you roll a new version out to your team, run a short acceptance check: confirm the model retrieves the preferred product name correctly, that an approved claim comes out with its qualifier attached, that an unapproved claim gets refused or flagged, that a banned term gets replaced, and that a channel profile changes tone without touching the core voice. This is a configuration handoff check, not your full editorial review process, so keep it short and specific to whether the kit itself is working.
You know this step is done when there is one clearly current kit, every downstream tool is using that same version, and the owner knows exactly when a change requires reloading the configuration somewhere else. A common mistake is quietly editing a shared file without updating its version or review date. AI output can shift when the underlying context changes, so your team needs to know which rules were active when a given piece was generated.

What to do next
Start with the facts and claims layer in step 2, since almost everything else in your brand kit for AI content depends on getting your product and boundaries right first. Once that is solid, add terminology and voice, then visual tokens, then package the whole thing into a manifest you can load and version. You do not need every field on day one to set up brand kit AI generation tools rely on. A kit that covers your highest-risk claims and your core voice rules, used consistently, beats an ambitious kit that never gets finished.
If you would rather not build and maintain this by hand, DeepSmith stores your company, products, personas, voice, and visual guidelines as structured Deep IQ context once, then applies it automatically every time Content Studio writes a new article. You can start a free trial and see how it works with your own brand.